how to finish drywall
Drywall Like A Pro!
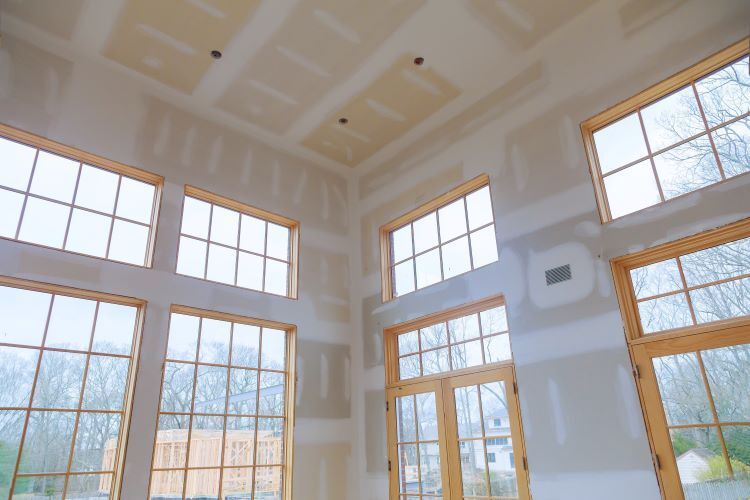
If you are reading this then I am sure that you have recently finished your drywall installation and are now ready to begin finishing. If this is not the case then chances are there is something wrong with your wall and it needs to be fixed first. No matter what any of my articles say or how many times I repeat myself, some people still think they can get away with doing their project without fixing issues on their walls first.
As a professional drywall company, one of our specialties is completing high quality finishes on all of our jobs. Without the proper finish, even the best installation job will look subpar at best. With that being said, having a poor surface for painting or staining does more than simply affect its appearance. It also decreases the durability and overall lifespan of your investment. Drywall is one of the most durable surfaces in any home but it will not last if you do not take care to protect it during finishing.
With that being said, here are just a few tips that can help ensure that you have an expertly finished wall by the time we arrive at your house/job site.
Be sure to properly prep before beginning finishing work on your drywall. This includes cleaning up debris from sanding, using mesh tape for seams or large gaps, patching all holes or tears with drywall compound, filling nail holes with mud, etc. If you need some help with this process I would recommend watching our article on walls before painting .
If you need to create a hole/void in the wall for any reason, make sure that you cut out a section of drywall slightly larger than necessary so that it can be properly patched. This is especially important if you have ever had pets or small children. Holes from push or pull toys, being stepped on or even through normal wear and tear will all increase over time and must be taken into account when preparing your walls for finishing work.
The number one thing that I see people do wrong while prepping their walls is not using mesh tape to cover seams before painting or applying primer/paint. While regular paper tape can get the job done it doesn't add nearly as much durability as using mesh tape will. In other words, chances are that if you are using paper tape chances are your paint will begin peeling or chip within the first few months of having it done.
Not only is mesh tape more durable than paper, it also creates a much cleaner look for your finished product. Paper tape can sometimes be seen on the seams of your wall which creates an appearance of low quality. Mesh tape is not only less visible but it actually molds itself to the shape of your wall after drying adding extra durability while ensuring a better looking finish.
While some may prefer to use paint/primer on their drywall before attaching or finishing any accessories (like switch plates or electrical covers), I would recommend against this unless there is no other option for whatever reason. The main problem with doing this is that you will not truly see all of the imperfections and issues with your drywall until after it has been painted/primer. This can be seen as a huge waste of money because you must then hire someone to patch those locations and pay for those materials again.
If at all possible I would highly recommend waiting until after your accessories have been installed before painting or priming. This way any mistakes caused by the installation process can also be fixed on-site which makes future repairs much easier and less costly than having to do it again due to poor preparation work.
Be sure that your mud (or filler) is properly mixed and does not contain any clumps, lumps or excessive amounts of powder before applying it over your sanded areas. These will only weaken the wall and make sanding after finishing much more difficult. You should also avoid adding any excess water or primer mix to your mud mix as this can also weaken the wall in certain areas.
It is never recommended to sand over drywall compound especially if it has not fully dried (overnight at least). This will create fine cloud-like particles that are very difficult to clean up, plus they will actually help your paint or primer seep into the drywall which will cause issues further down the line.
If you do need to sand over drywall compound ensure that you let it dry for several hours before sanding so that it won't cloud up your sandpaper with dust upon finishing. Also be sure that you use a very fine grain of sandpaper to avoid creating too deep of scratches and causing potential problems.
The best time to paint your drywall is after the mud has dried overnight and it's ready to be sanded smooth. Be sure not to try and do it any sooner than this as you will create issues, which we will touch on later in this article.
No matter what type or brand of paint/primer you choose to use, always ensure that the sheen level matches whatever type of finish is already present in the room you're painting. For example if an existing wall is finished with semi-gloss then only use paints with a similar finish (like semi-gloss). This may seem like common sense but painting over flat drywall with glossy paint will give bad results.
The same goes for texture, be sure that the mud you are applying to your wall matches the existing texture so that it can help hide any imperfections or discrepancies between them. For example if up until now your wall has been covered in a popcorn (or knockdown) texture and you decide to smooth it out without repairing anything then this may not go unnoticed by anyone looking closely enough. This is because most issues like damaged joints and popped nails can still be seen through a smooth finish.
So make sure to keep all of this in mind when picking the paint/primer that you will use on your walls as they play a big role in how well they turn out at the end.
The last thing that you should keep in mind when choosing the right paint/primer for your wall is how it will affect your drywall taping and finishing process. For example if your chosen brand or type of primer has a very strong smell (like an oil-based primer) then be sure to use this outside as the fumes can be very harsh at times depending on where you are working. Also avoid using spray primers that need to be applied over multiple coats unless you purchase multiple units specifically for this purpose.
This is because these types of primers give off too much overspray which causes them to coat everything in its path, including our sandpaper which causes us even more problems than normal. When using standard water-based primers on the other hand you won't have to worry about this as they are much easier to clean off.
In the end what's most important is that your chosen primer matches your wall type and finish level perfectly, anything else will only cause problems for yourself further down the line. If you're not sure then go with a water-based one as it is generally safer and healthier to use.
Always remember that preparation work is key when it comes to any project, especially when painting drywall since this step can make all of the difference in achieving a perfect finish every time.
If a newly painted wall starts peeling or bubbling up after several weeks or months then this means that there was an issue with either your taping or finishing process. Now if this was an issue with your taping then the paint/primer probably wasn't able to properly adhere to it, thus causing peeling issues.
Now if the problem is on the finishing end, then this can either mean that there was not enough thin coats of mud applied (and you ended up using too much in one go) or simply that it dried too quickly and started cracking.
Always remember that thin coats always work best when painting drywall as they help seep into the cracks and other imperfections throughout while giving a clean smooth finish. Avoid applying multiple heavy coats because this will only make things worse and cause major problems later down the line.
The same goes for paint strips and other drywall texturizing tools because in most cases they cause problems and leave troublesome bumps in the area that we are trying to smooth. So if you really want a good clean finish then avoid using these tools and instead go with paint or something similar instead, just remember not to use too much of it when painting your drywall.
As mentioned before when applying primer/paint always ensure that you're in an open environment with proper ventilation because otherwise the smell will become overwhelming rather quickly. This mainly applies for when using oil-based primers or paints as water-based ones are less noxious due to lower chemical levels used during production.
When adding texture to our new wall it can be tricky at since there are many methods which must be followed to ensure we get it right. Make sure that you avoid using paint strips and other texturizing tools since they leave bumpy surfaces and problems later on down the line.
The best method for adding texture is to use a drywall knife as this allows us to smoothly run along our wall at proper angles without leaving any bumps behind. These types of knives also give off less dust than most other methods which creates a much cleaner environment for application.
When applying your first layer of mud try not to go over the same spot twice as this only causes problems and will cause more patches than normal in some cases. Instead wait until your previous coat has dried up completely before reapplying another coat, just remember not to wait too long otherwise it will dry up and it will be much harder to apply the next coat.
When adding texture to your wall make sure that you avoid applying too much in one go, otherwise this can cause bubbles to form between your previous layers which can lead to major issues down the line. Instead try to add small amounts at a time while lightly going over problem areas with slightly more pressure just so that they are properly covered.
Always remember that underneath every good-looking wall there is usually some sort of patch or imperfection because nobody's walls are perfect. This means that you should always have an undercoat ready for when you realize you need to fix something up, mainly because by then it could already be too late if you don't have any on hand should the need arise.
When sanding down our wall we must always remember that sandpaper can cause major scratches and other marks on the surface of your drywall if used incorrectly. To prevent this from happening make sure to use a light amount of pressure when sanding your wall as it ensures that you don't damage its surface while also giving a better overall finish at the end of the day.
When cutting smaller pieces of drywall or any other odd shapes for that matter make sure to cut them out in a way where they are not too thin and flimsy, otherwise they will snap near the crease quite easily causing further complications later down the line. This is because by making them too thin they lack support around their outer surfaces which causes cracks and other breakages in the long run.
We hope this helps to inform you on many of the several tips and tricks that can go a long way when it comes to a perfect finish to the surface of your walls and ceilings. We understand there's a lot of information in this article but we feel that it is our duty to inform you properly so you can make the best decisions possible when it comes to the drywall of your home or business.
With the tips in this article it will be easy for one to make sure that they are getting a proper finish when it comes time for them to paint over their new walls, whether they are applying texture or not. We hope you found this help satisfactory and once again thank you very much for surfing through our articles, but don't forget about drywall repairs or renovations because we offer many other articles on all sorts of topics! Thank you again and have a fantastic day!
You might also like
